
How to build an elevated Cedar lookout bench

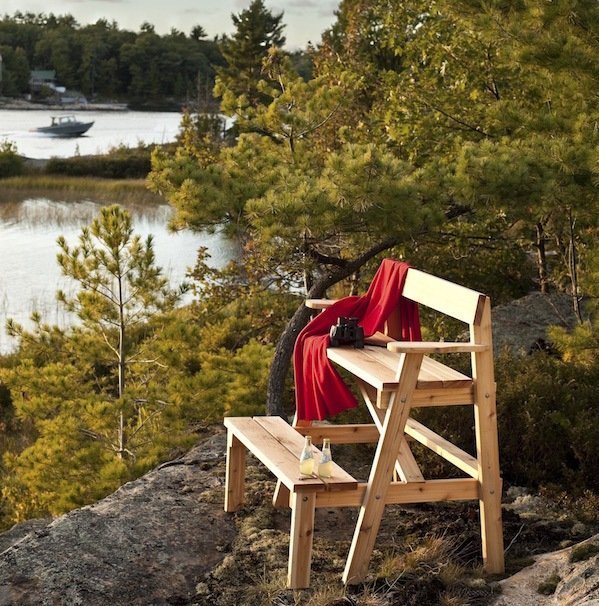
The shape of the lookout bench might seem familiar because the design uses the same details found on most picnic tables. Photos by Roger Yip.
The perfect seat for the perfect view
By Paul Lewis
The end of a perfect summer day in cottage country is an event worth planning for. As the sun sets over rippled water, shimmering against darkening silhouettes of rocks and trees, the only thing you can add is a place to sit comfortably and take in the beauty. This bench, simple to make from Western Red Cedar lumber, can help you maximize the view. It requires a few angled cuts and butt and lap joints, held together with galvanized carriage bolts and deck screws. The shape of this bench might seem familiar because the design uses the same details found on most cedar picnic tables: horizontal supports bolted to angled vertical legs, with 2x6s offering a place to sit and support your feet. Although all project parts could easily be cut with a handsaw or handheld circular saw, a mitre saw makes it easier and quicker to do the necessary slicing.
The bench is designed for taking in beautiful sunsets in comfort with armrests and footrests providing support as the sun goes down.
Work on the side
Start work by building the two side frames. Cut the back and front legs – two of each – followed by the footrest legs, the seat supports and the footrest supports. (The plans and materials list show all the specific details.)
It’s easiest to assemble each side frame on a sheet of plywood or OSB as a reference. Choose one corner of the sheet and use the edges as your guide for positioning the three legs that are part of one side frame. Mark the positions for one back leg, one front leg and one footrest leg, then use double-sided tape or deck screws to secure these parts temporarily to the sheet. Continue by marking positions for the seat support and footrest support, then secure these temporarily to the legs with screws. Mark and drill holes for the 1⁄2″-diameter carriage bolts that connect these supports to the legs, but don’t bore these holes all the way through; there’s no reason to damage the plywood substrate. Instead, start the holes and then remove the side frame from the plywood before boring the bolt holes through the wood. Repeat the process for the second frame, making sure you make it a mirror image of the first frame. When you bolt a side frame together, all three legs sit on the outside face of the frame, with the seat support and footrest support sitting on the inside.
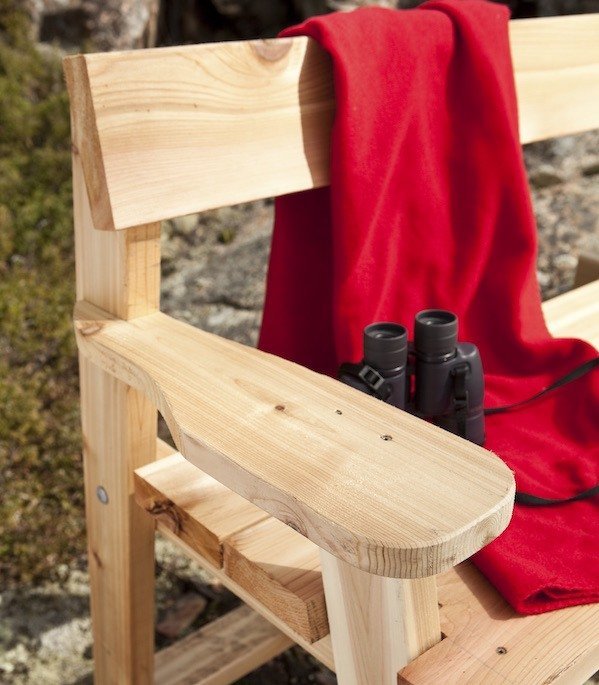
The backrest is fastened to the back legs, adding to the structure’s stability.
All Horizontal
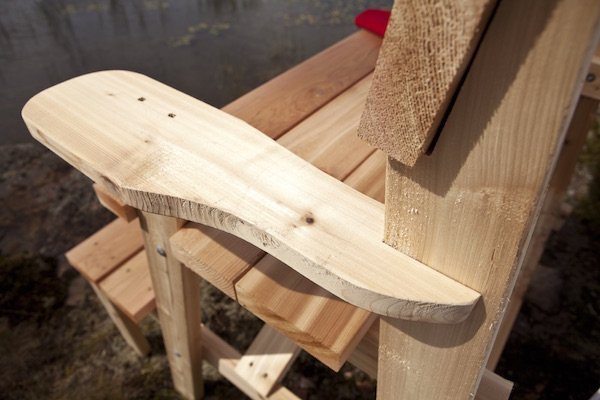
With both side frames built, it’s time to cut the backrest, the seat boards, the foot boards, the armrests and the back support. With the exception of the slightly shorter back support and the curved armrests, all horizontal pieces are the same length. Have a couple of helpers hold up the side frames on a flat floor surface, and then secure the horizontal pieces with #10 x 31⁄2″-long corrosion-proof deck screws driven into the side frames. The building plans show the location of the angled notches you’ll need to cut in the ends of one of the three seat boards so that it fits around the legs. The armrests also need angled notches to fit around the back legs. In both cases, a jigsaw works well for this job, but you could also use a handheld circular saw for most of the cuts, finishing up with a handsaw in the corners. At this stage, your lookout bench will be fairly strong, but not ideal. Don’t sit on it yet. Although the diagonal brace is just one piece of wood, it adds a surprising amount of strength to the project because of its angled orientation. Cut this brace to fit your frame when both sides are square and plumb. The best way to square up the bench is to place it on a flat, level floor. If the bottom ends of the feet are level with each other, use a 24″ level as you push and pull the project until both side frames are straight up and down, or plumb. Fasten the diagonal brace while holding the side frames, and your DIY Western Red Cedar bench will be a true, square and long-lasting place to watch one of the greatest shows on earth.
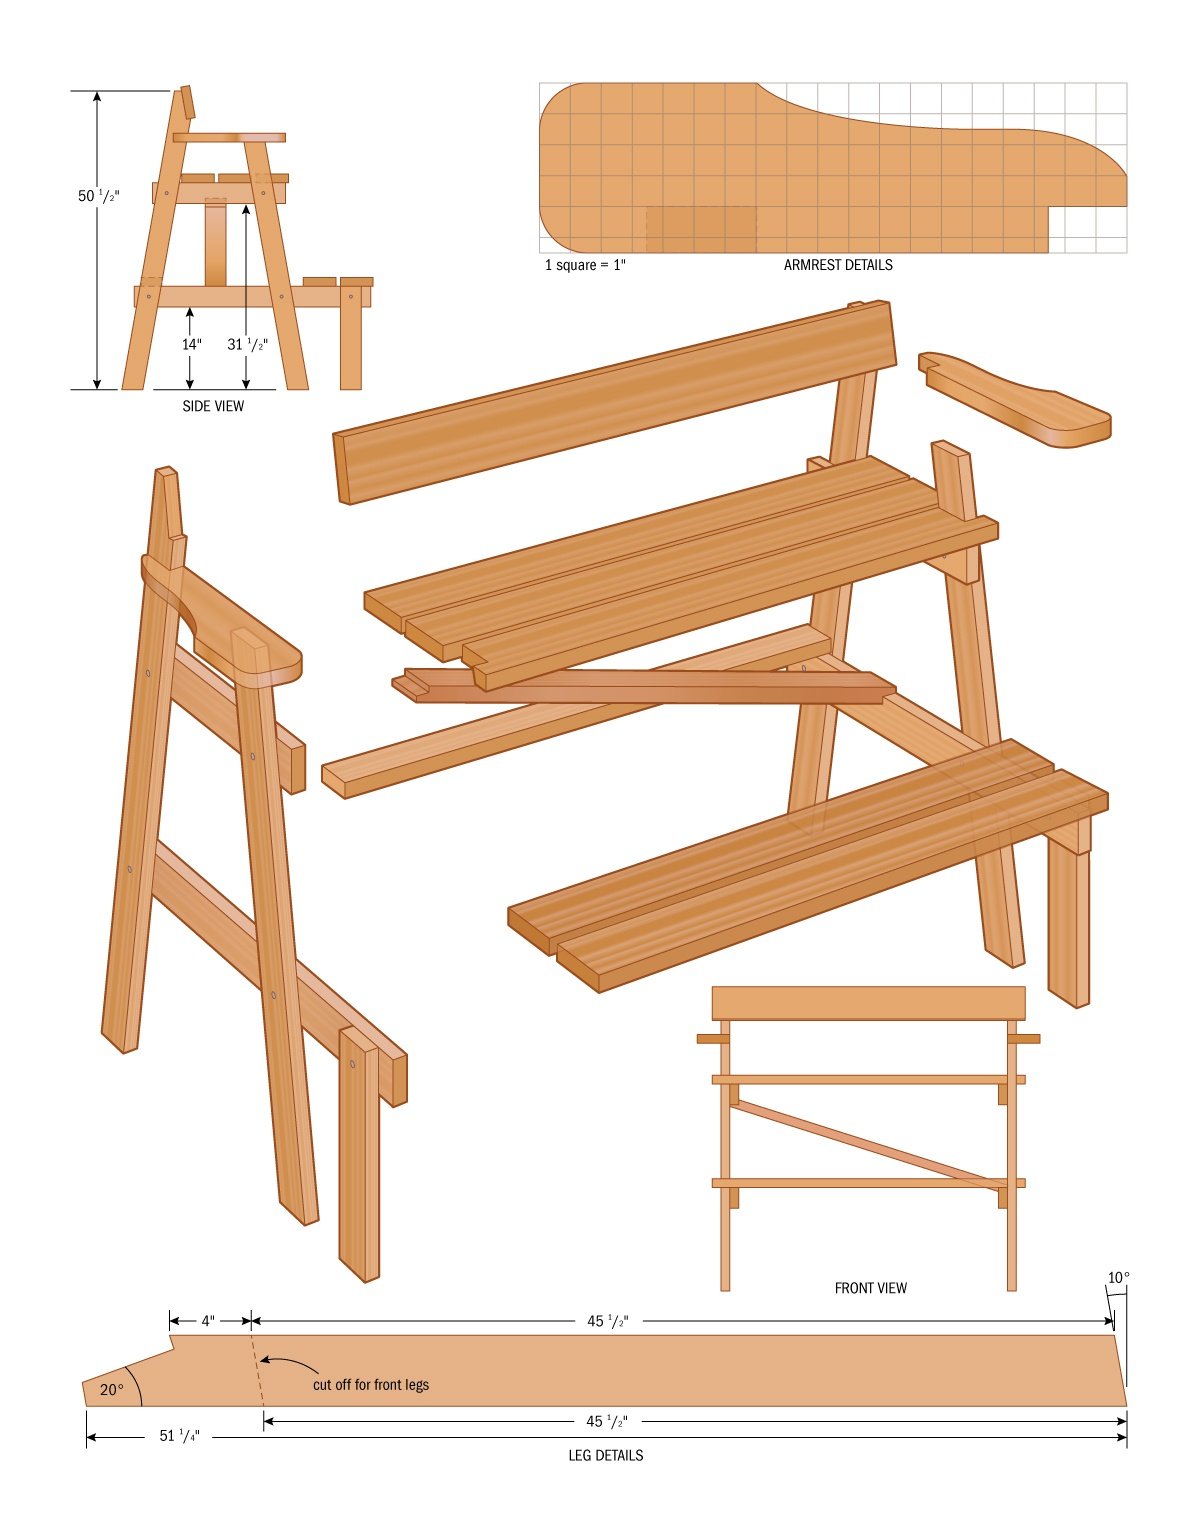
| Part | Size (T x W x L*) | Qty. |
| Front Legs | 1-1/2″ x 3-1/2″ x 42-1/2″ | 2 |
| Back Legs | 1-1/2″ x 3-1/2″ x 51-1/4″ | 2 |
| Footrest Legs | 1-1/2″ x 3-1/2″ x 17-1/4″ | 2 |
| Seat Supports | 1-1/2″ x 3-1/2″ x 22″ | 2 |
| Footrest Supports | 1-1/2″ x 3-1/2″ x 39-1/2″ | 2 |
| Backrest | 1-1/2″ x 3-1/2″ x 44″ | 1 |
| Seat Boards | 1-1/2″ x 3-1/2″ x 44″ | 3 |
| Foot Boards | 1-1/2″ x 3-1/2″ x 44″ | 2 |
| Armrests | 1-1/2″ x 3-1/2″ x 19″ | 2 |
| Back Supports | 1-1/2″ x 3-1/2″ x 39-3/4″ | 1 |
| Diagonal Brace | 1-1/2″ x 3-1/2″ x 44″** | 1 |
all wooden pieces made from Western Red Cedar
*length indicates grain direction **trim to fit
Recommended Tools: Mitre saw or circular saw, jigsaw or handsaw, level.