
Project of the Week – Home Improvement

How to Transform Your Outdoor Living Space with a Decking Makeover
Building Challenge
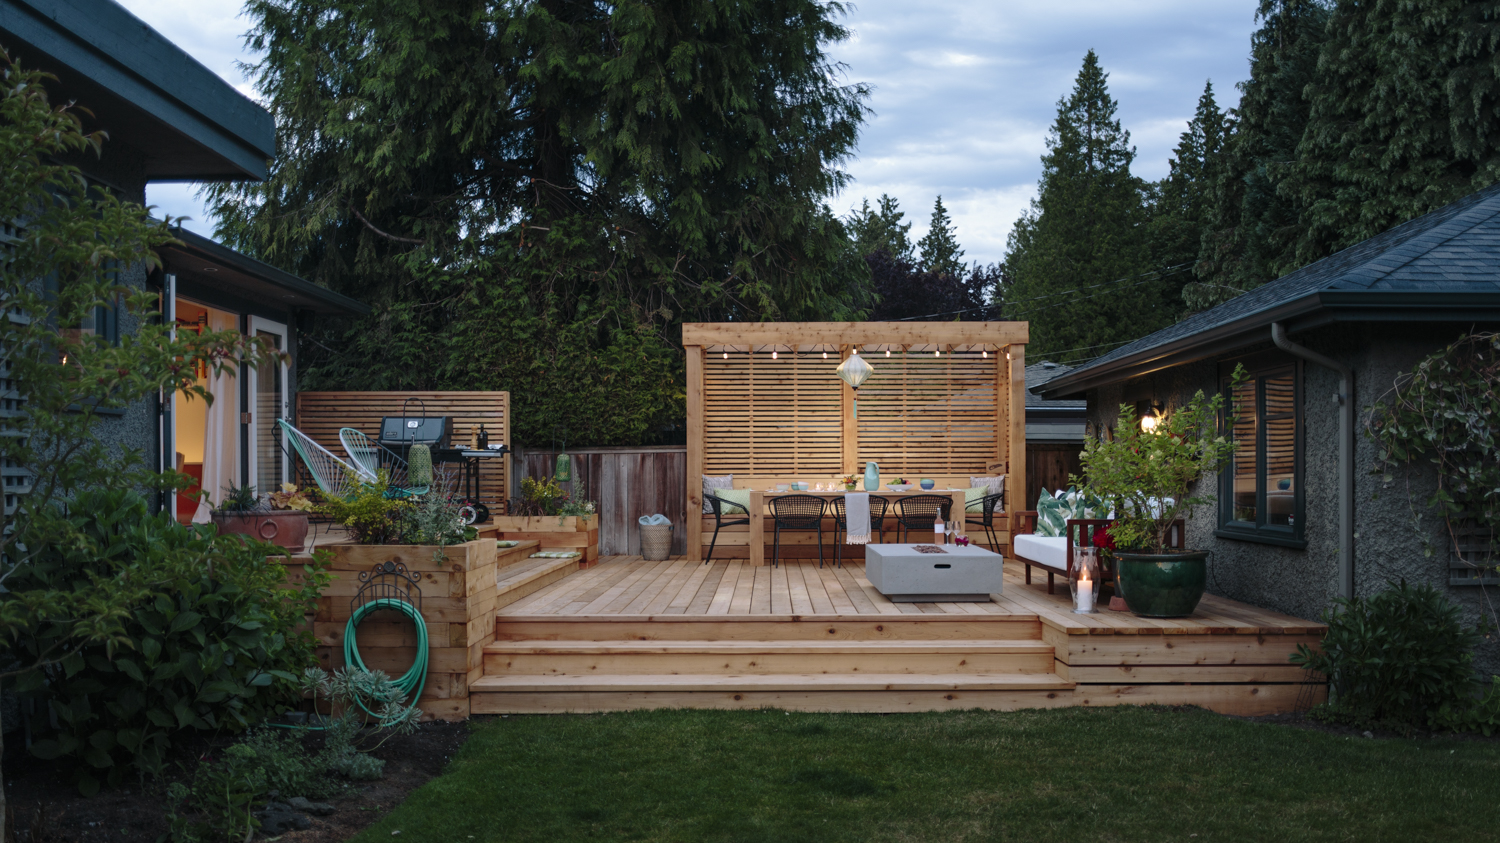
The homeowners here weren’t happy with the decking material they used to have. It was rotting, unsightly and the overall design was dated.
Cedar Solution
Rip it all up and replace it with a beautiful Western Red Cedar deck. Which is really going to complement their garden and their woodsy backyard. Plus, nothing looks, smells or feels quite like Western Red Cedar.
Design Details
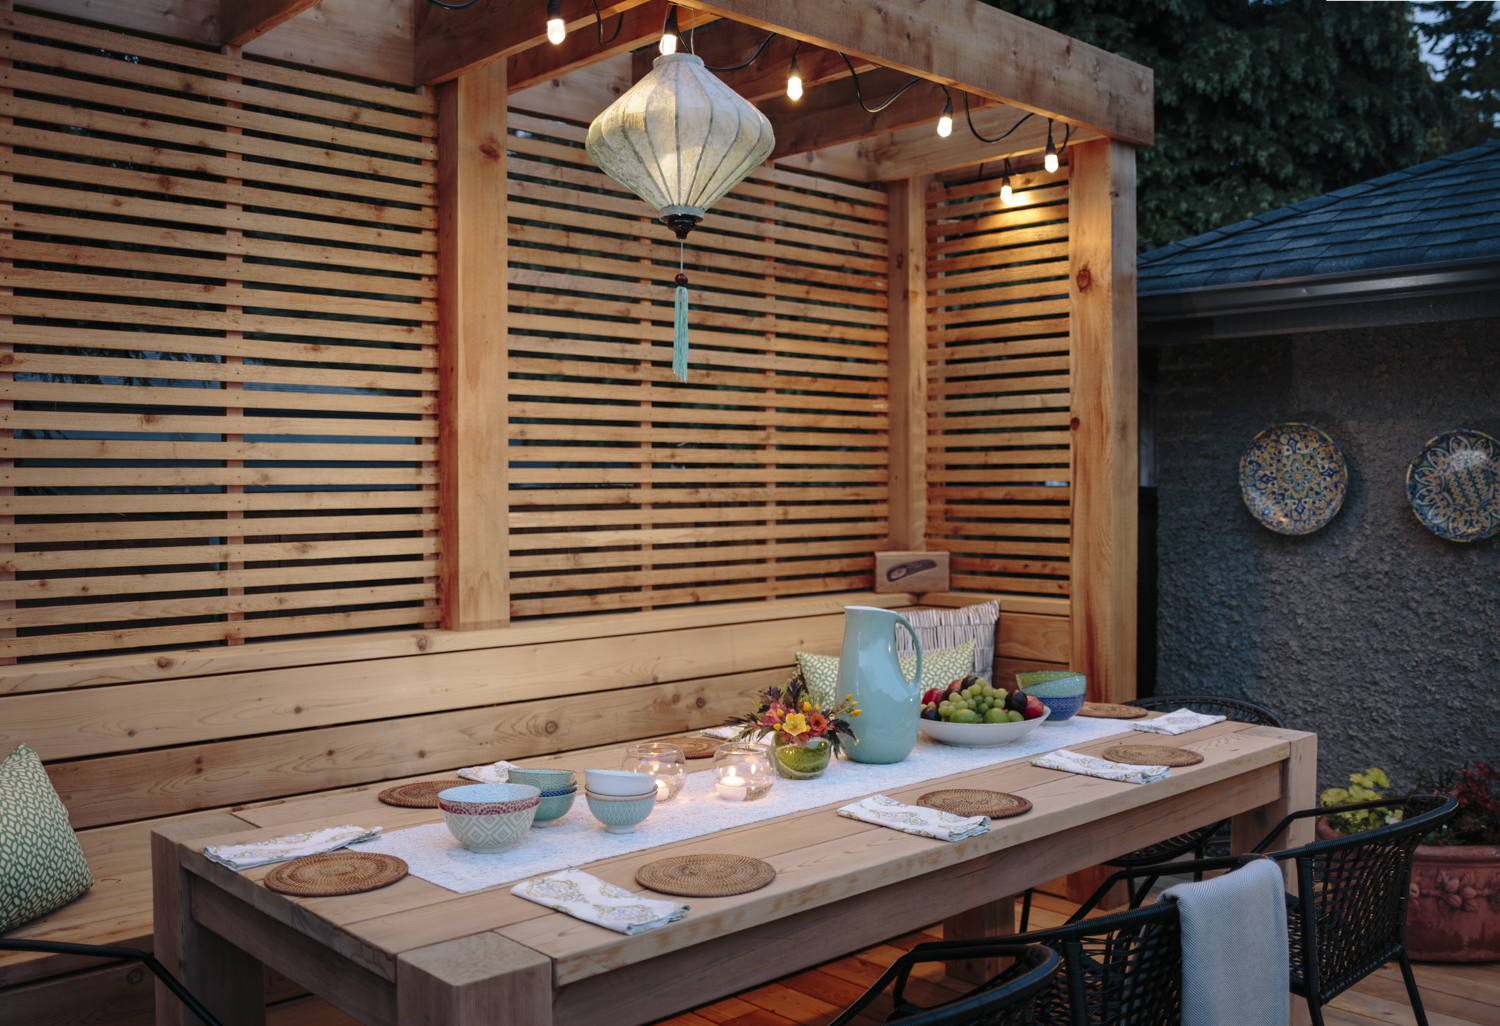
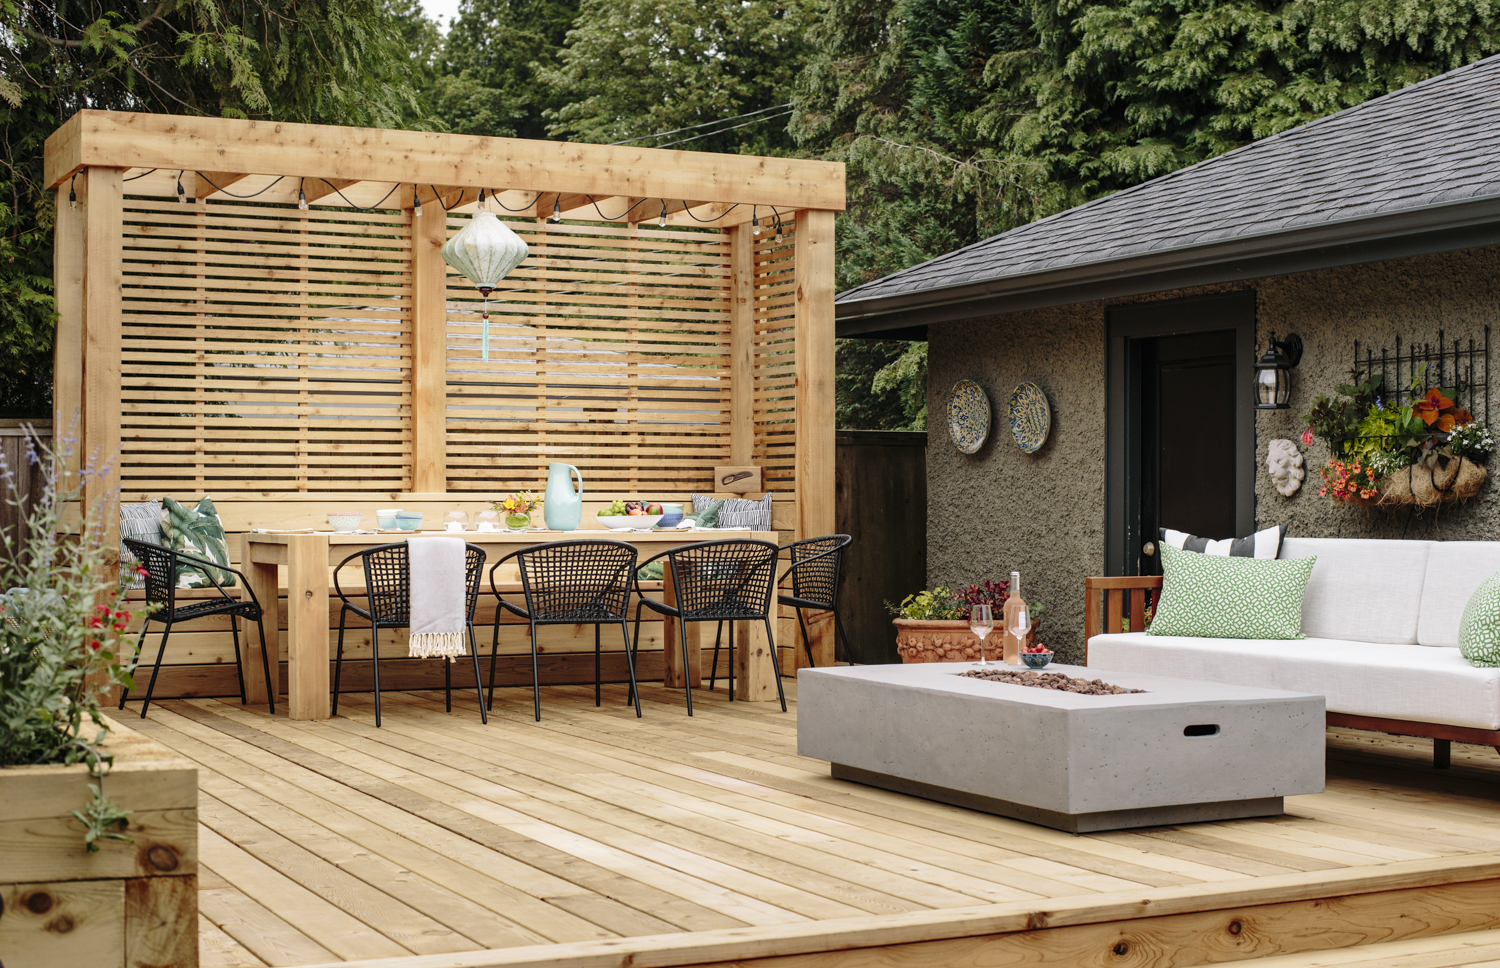
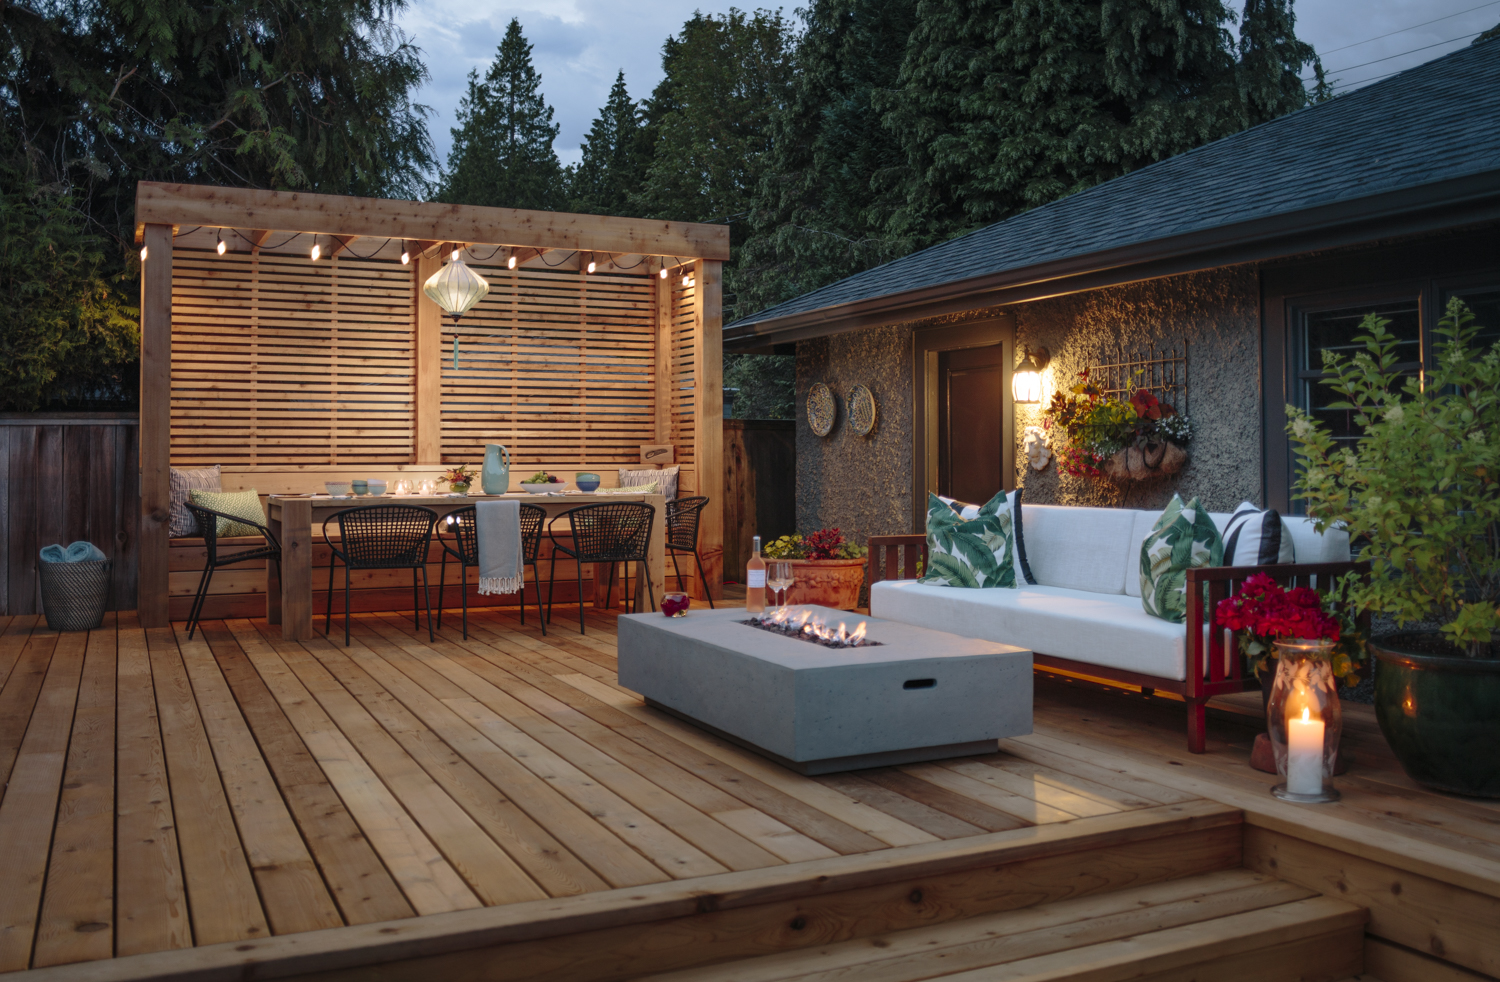
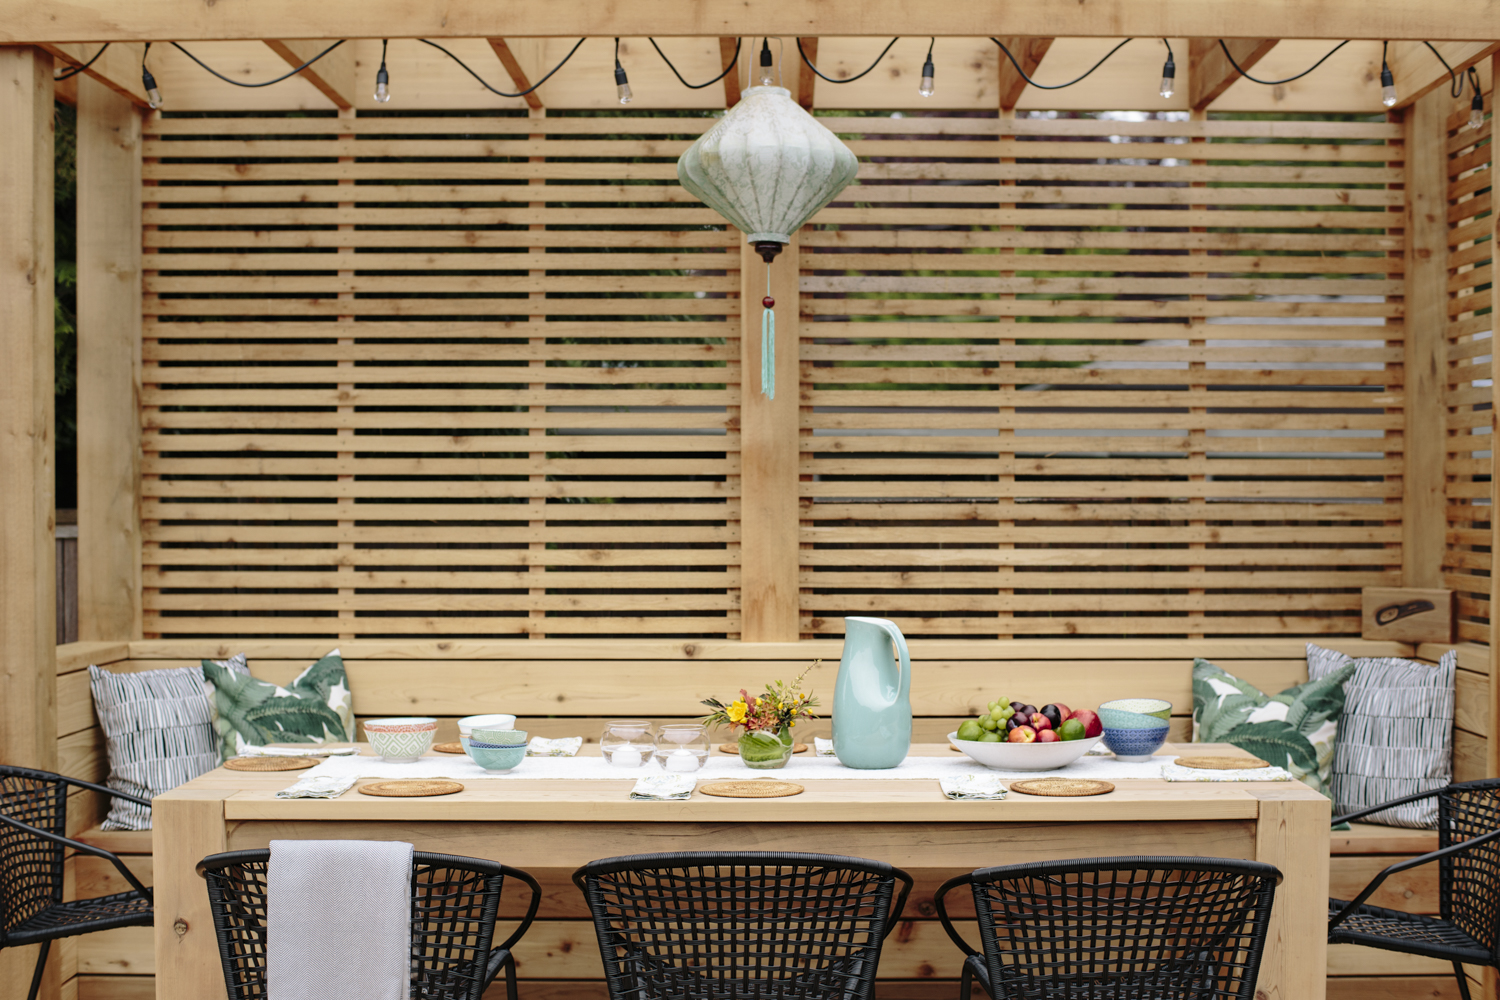
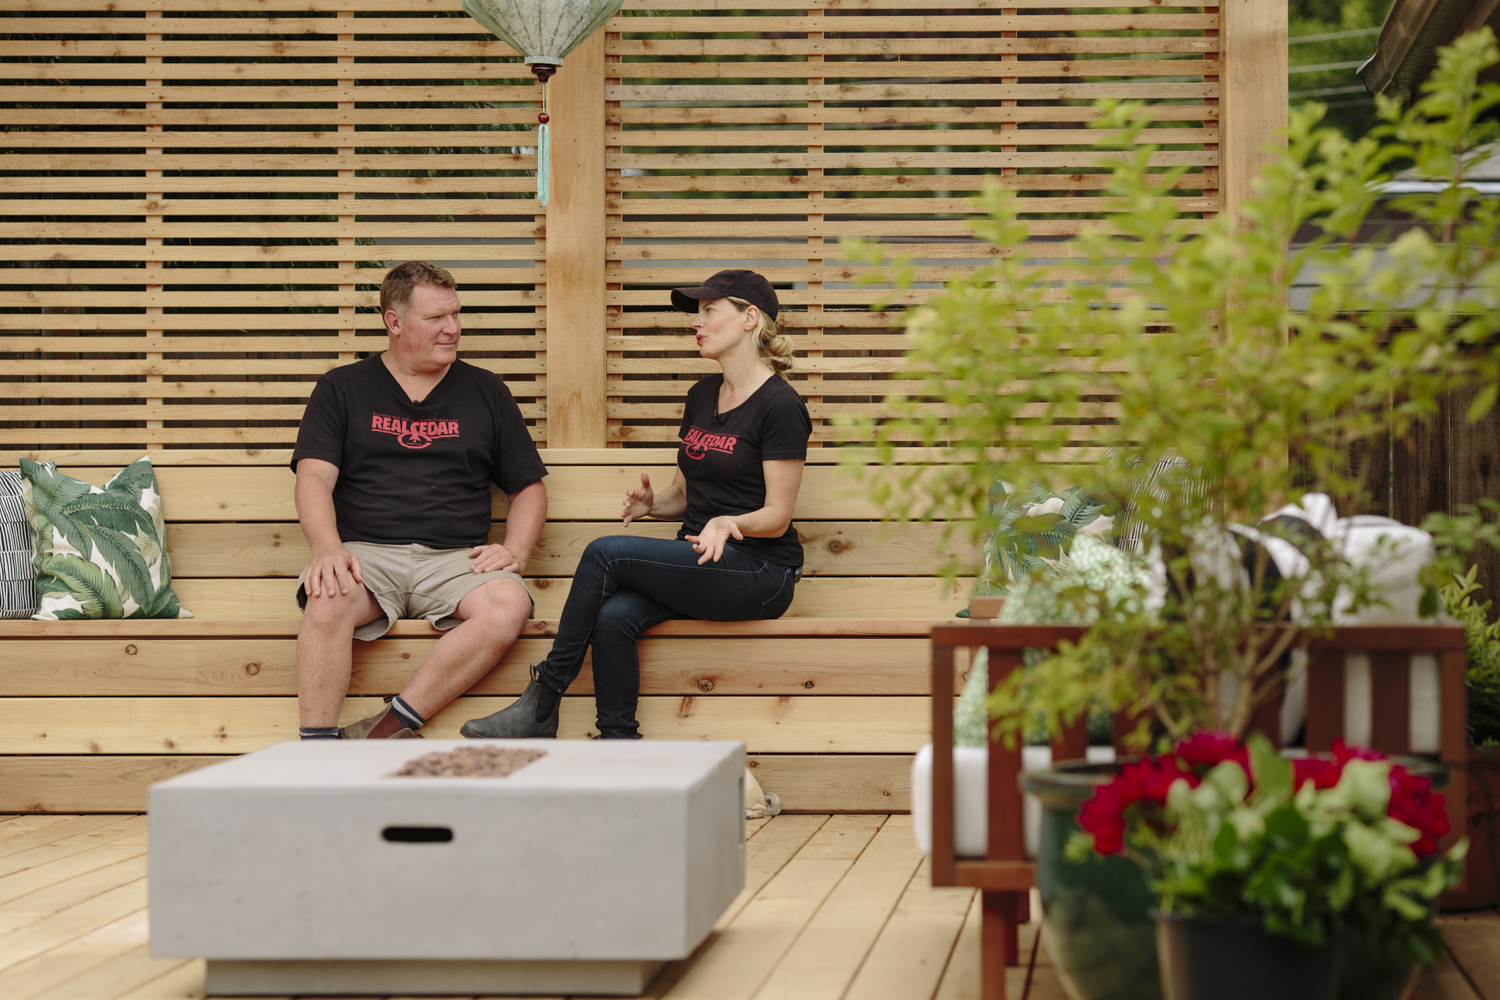
Jim West of Westworks Construction was brought on board to design an outdoor oasis in close collaboration with the homeowners. They decided on a multilevel deck connected by fully extended terraced stairs. At the heart of this space is a modern cedar pergola that defines the dining area – complete with a built-in bench and a farmhouse outdoor dining table. The stairs leading to the upper deck are bookended by two lovely planters where the homeowners can grow herbs and things like that for the kitchen.
Personalized Project
The entire project is totally customized for the allotted space as well as the aesthetic preference of the homeowners, which really speaks to Western Red Cedar’s versatility. If you’re considering creating your own outdoor oasis, check out Real Cedar’s Outdoor Living Center for free downloadable building plans and pro tips from award-winning builders like Jim. And with any major decking overhaul, Real Cedar recommends following these best practices from Jim:
Select the Right Building Material
Whether you’re building a project yourself or hiring a building professional, you want to select right material. For this project, the homeowners and Jim both agreed Western Red Cedar was the only way to go.
“Western Red Cedar is naturally resistant to rot decay and insects, so it’s going to last for summers to come with minimal maintenance,” explains Jim. “And it’s really easy to work with. It’s lightweight. It’s very true and straight and the finished product just looks wonderful.”
Decking Design Pro Tip: It’s important to allow for ventilation to achieve optimum performance.
Store Wood Properly Onsite
Regardless of the size of your deck, you always want to store your cedar properly. You want to drop your lumber package on a nice level area. In this case, the lawn – although driveway or garage would be better. You want to lay down a vapor barrier between the wood and the ground and then drop it on some dunnage, which is essentially 2x4s and 4x4s to keep it up off the surface – this storage method will stop the wood from wicking up any moisture.
“You also want to keep the wrap that it comes in so if when you’re not working on it or when you’re done at the end of the day,” explains Jim, “you can cover it up to protect it from the elements.”
Find a Focal Point
During the design process, walk around on the area you intend to install decking and take note of your visual focal point – where your eye is most likely be drawn to.
“That’s where you want to start with your full boards,” says Jim, “and then you want to work back from that point into areas where your eyes less drawn, which is where you want to put all your funky cuts. In this case, the top nose of the stair case is where you want the full boards.”
Start with a Sturdy Frame.
The original 20-year-old pressure treated frame on this property had some serious rotting issues, so before Jim and his crew started installing new decking, they had to replace any framing components that might threaten integrity of the new deck. Once the framing upgrade was completed, Jim installed a beautiful knotty grade of Western Red Cedar decking.
“Knotty’s really going to add a lot character and warmth to the project,” says Jim. “Plus, it’s a cost -effective choice.”
5. Lower Your Lumber Costs
Before you place your wood order for building outdoor structures such as pergolas, planter boxes and built-in seating, head down to your local Western Red Cedar supplier and see if you can get a deal on shorts.
“Another cost saving measure we did with this project is we didn’t use any primes,” adds Jim. “We used random lengths instead and that’s really going to save these homeowners a lot of money. You end up with a lot of butt joints that way but, if anything, with a project like this, it adds to the texture of the deck and the overall appearance.
Find the Right Fasteners
The homeowners here really want to showcase the wood’s natural beauty, so they opted for a blind fastening system. This will create an attractive fasten-free deck surface. Pro tip: Always make sure there’s enough space between decking board to allow proper airflow and debris to fall through. For this deck, we left a ¼ inch between each board.
“Whenever possible, use stainless steel fasteners – they won’t corrode or stain the wood,” says Jim. “You can also use hot-dipped galvanized screws and nails too.”
Incorporate Beautiful Stairs
Jim and his crew added beautiful wide treads that lead from the upper deck to the lower deck and then again from the lower deck to the yard. Not only do they add some drama to the design, these stairs double as extra built-in seating – perfect for entertaining during the summer months. Interestingly, Jim only installed the decking right up to where the stair case starts.
“Well, we know the structure of the staircase will go there, so there’s no sense in putting down this stunning 2×6 cedar decking underneath because it will be covered up – that would be a waste of a beautiful wood. It’s best just to install the treads directly on the stair frames.”
Plan Your Pergola
Design-wise, Western Red Cedar has a timeless appeal when it comes to outdoor structures. Builders can use it for traditional or modern pergolas or in Jim’s case how ever the homeowners envision their structure.
“We just kind of roughed it in with the 6x6s,” says Jim, “and then we’re going to have a meeting with the owner shortly and whatever their vision is we’re going to create it.”
Create the Desired Effect
Another benefit to using Western Red Cedar is that it’s pitch and resin free, which means it can accept and hold a wide range of finishes beautifully. So, you can achieve any look that best suits your project. Learn how to choose the right finish for your project.
“The homeowners here are going to let it weather naturally, eventually turning a beautiful silvery patina, which is the lowest maintenance option,” says Jim. “But if they were going to stain it, I’d recommend staining all six sides of each board prior to installation – or better yet, get it pre-finished by a professional so that the wood is already to go once it arrives on the worksite.”
For your own outdoor living space tips and idea, you can visit RealCedar.com for free downloadable building plans, more how-to videos, an inspiration gallery and pro tips from guys like Jim.
DID YOU KNOW? Cedar’s also cool under foot…and paws. This means the homeowners don’t have to scramble for their flip flops every time they step out onto this deck – they can just cruise on out and enjoy this beautiful space.