
Rocking Chair DIY with April Wilkerson
Since moving to the country, April Wilkerson, has been furnishing her outdoor living space with plenty of seating options. The Texan DIYer has a chair for every occasion. So far, she’s built and designed a Western Red Cedar Adirondack chair, a tall Adirondack chair, a two-person porch swing, a single person porch swing, and recently she added a rocking chair to the mix.
DIY Super Star, April Wilkerson, Shows Us How to Build this Classic Rocking Chair
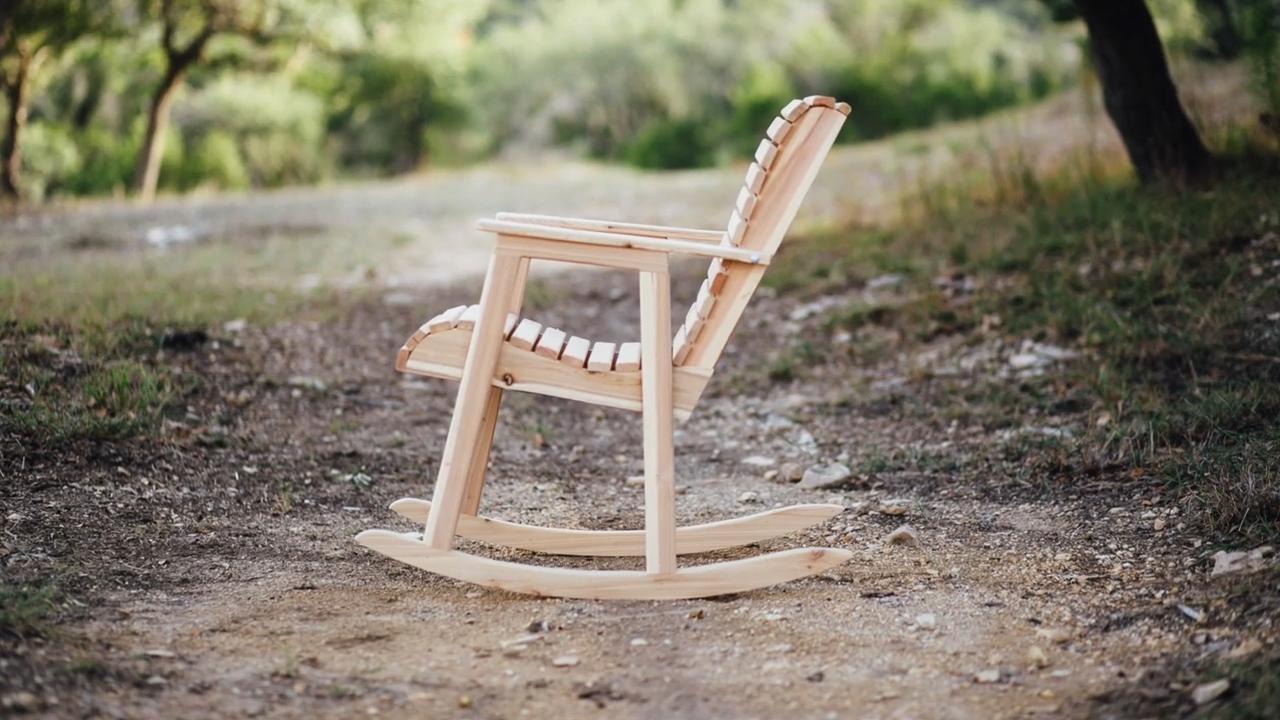
“It’s a very simple design and build, but it is sturdy and it’s super comfortable,” she says of her take on the classic rocking chair, which she built using one of her favorite top-performing building materials. “I picked Western Red Cedar because even though it’s a naturally durable material, it is extremely lightweight and will allow me to easily lift and move the completed chair around.”
It’s also a green building choice. In fact, woods such as Real Cedar leave the smallest carbon foot print than any other construction material. With that in mind, she started out with six 1 x 6s of beautiful, renewable Real Cedar and set about designing the chair using 3D modeling software. Then she cut and traced some custom templates to make the job go a lot smoother. After that, it was time for this maker to make!

Below are 10 super basic building tips for this project. For more detailed instructions, watch the entire video above.
Step 1 – Prep Wood
Use a miter to cut the parts to rough lengths first before running each piece through the planer.
“This will drastically reduce your sanding time later on,” says Wilkerson. “Since I made my stand for the planer mobile, I always move it out to my shop porch to keep the mess down – pro tip!”
Step 2 – Build Frame
Join pieces together with waterproof glue especially formulated for wood and outdoor use. Make sure the two angle parts are flush and then clamp them down before screwing together.
“I repeated these steps to make up a second, making sure it mirrors the first one and not identical,” says Wilkerson.
Step 3 – Cut Slats
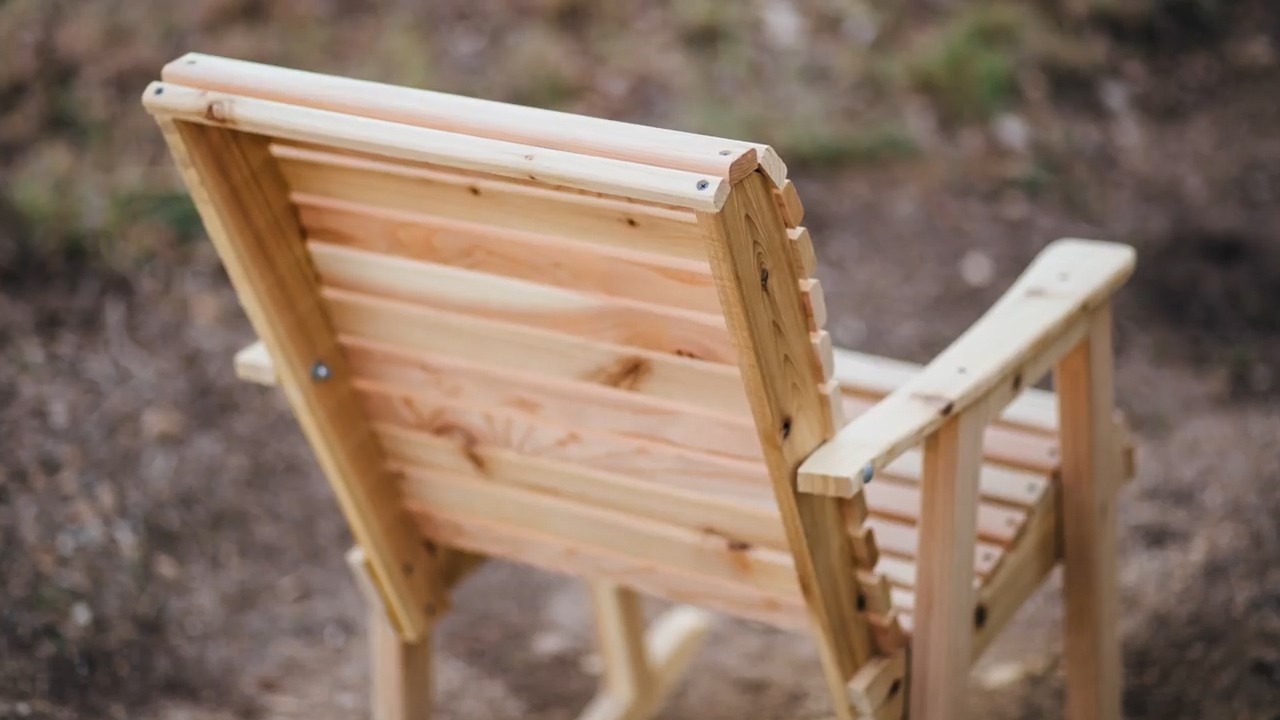
Chop the boards to length. Then, using a table saw, cut into strips. Next, round over all the edges for a softer look and feel.
“I loaded all my slats up on my mobile workbench and wheeled them to my router table where I used a 1/2” infinity round over bit on both of the long edges.”
Step 4 – Assemble Seat
Use a small dab of glue on the underside of each slat at both connection points. Then screw each slat in place with stainless steel screws.
“I started with the very back most slat on the base, then jumped to the very front and worked my way back from there,” she says adding, “I cut a spacer to make lining these up go quick.”
Step 5 – Make Legs
Set seat aside and begin ripping boards to width at a table saw, then use a miter to cut the end angles and also the lengths of the boards. Note: the joinery on this rocking chair is half laps.
“What I did was use two boards, cut to different lengths then glued them together to create the half lap,” says Wilkerson. “Whereas if I was using thicker cuts of cedar, then I would have carved away half of it to create this joint.”
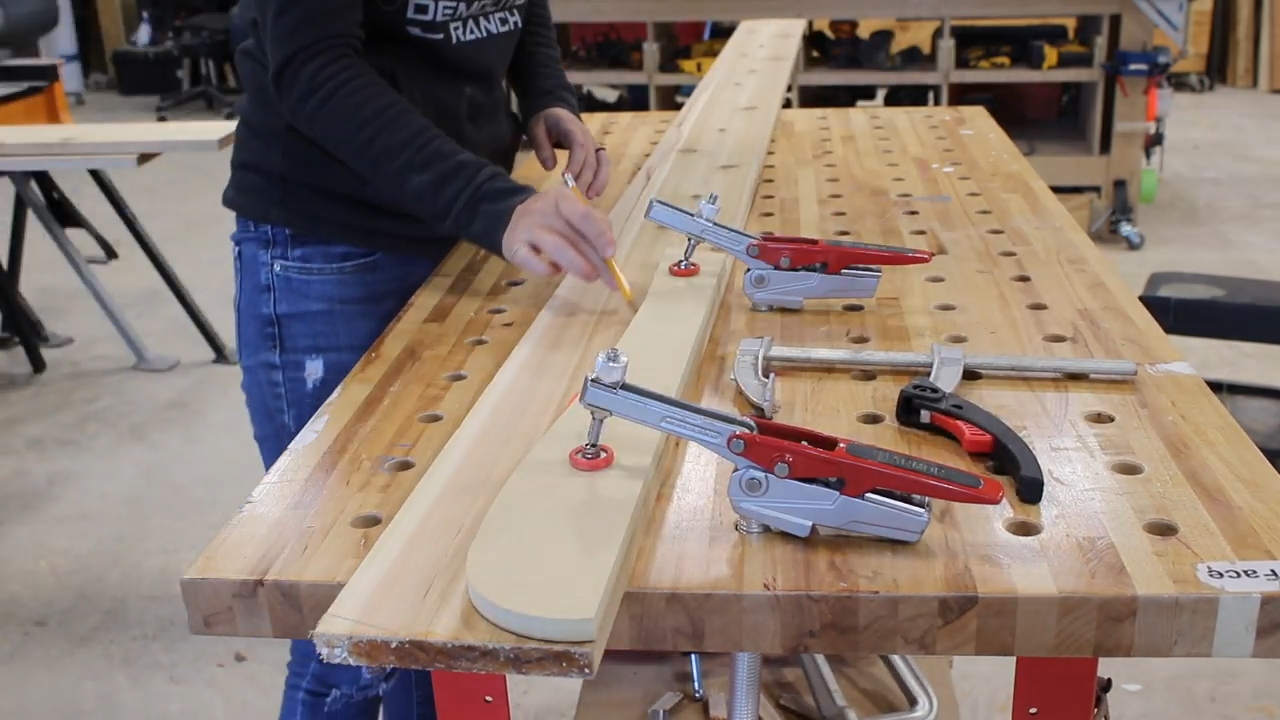
Step 6 – Build Rockers
This part holds a lot of weight so when you are tracing this, tilt the template as much as you can to get as much straight grain running the length of the rocker. Make sure bottom curve not any hitches in it and before fastening to legs, clamp all pieces together, set it on the floor and test its rocking capabilities.
NOTE: For this part Wilkerson actually sat in the chair. Real Cedar DOES NOT recommend sitting in the chair during this testing phase.
Step 6 – Attach Legs
Whether you follow April Wilkerson’s exact template or customize the rocking chair to your liking, one thing you’ll notice is Western Red Cedar is a pleasure to work with – it lays straight, holds true and the tools love it.
“For this part, I laid down wood glue, then attached the short legs to the long legs, making sure everything was lined up flush,” says Wilkerson.
Step 7 Fasten Arms to Chair
For outdoor cedar projects, double hot-dipped galvanized screws can be used, however, stainless steel screws are recommended.
“I originally thought to do some blind dowels to pin arms to the legs, but since the screws are exposed on the seat, I figured these would blend in as well,” she says.” Of course, countersinking here as well to seat them under the surface, giving it a nice smooth feel. Then on the back, I punched a hole through and attached it using a carriage bolt.”
Step 8 – Choose Finishing Option
Western Red Cedar is pitch and resin free, so it accepts and holds a wide range of finishes beautifully. For the lowest maintenance option, you can let your chair weather naturally.
“I think raw Western Red Cedar is gorgeous so I’m going to apply a clear coat to keep its beautiful colouring,” says Wilkerson. “If you don’t know, Western Red Cedar is naturally rot resistant so if you plan to place your chair in the elements, then it’s a good choice of material.”
Step 9 – Enjoy Your Chair!
April Wilkerson’s classic cedar chair has timeless appeal – perfect for sipping lemonade on your porch, or if you’re expanding your family, it’s also a really sweet addition to any nursery. To build one yourself, find a Real Cedar retailer near you. For Wilkerson, it’s gonna be another place to chill with her animals.
“Ahhh, I can’t tell you how much I love it,” she says. “I’m so happy with it.”
