


Choosing the Right Finishing Type
Everyone knows that Western Red Cedar is an ideal building material for the outdoors. Not only is it beautiful, but it’s naturally resistant to rot, decay and insects, so it just goes to show that nature’s most versatile building material is the perfect choice for siding and decking. But more and more architects and homeowners are starting to appreciate Cedar’s stunning appearance and ability to beautify interior spaces. Regardless of a room’s style or size, cedar’s unique look, feel and smell can enhance the living experience in a home.
Whether it’s an expansive ceiling and soffit system, a feature wall or exposed posts & beams, bringing cedar inside is the best way to add visual appeal and create a greater connection to nature.
Bonus: Interior applications require less protection than wood that’s exposed to the elements. That’s why most people opt for transparent finishes such as waxes, shellac and other clear film forming finishes. The exception being areas with high moisture levels such as bathrooms. In which case, an exterior grade of finish is recommended.
For all other interior cedar applications, you simply want to enhance the wood’s natural appearance with minimal effect on indoor air quality.
Note: Always ensure that the coating is recommended for interior use.
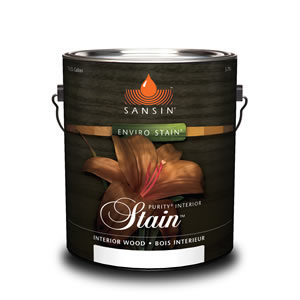 Real Cedar Member Sansin’s Purity series can be used for interior applications. The Purity Clear formula yields high-solid finishes, bringing out the natural beauty of the wood’s color and texture. For a crystal-clear, high performance finish that doesn’t amber the wood, Purity Glacier is a good option. To add a beautiful tint to your wood, the Interior Stain offers long lasting color in wide range of hues with exceptionally deep penetration in an ultra-low VOC formula.
Finishing Types
There are an abundance of finishes to choose from when finishing Western Red Cedar indoors. Select from one of the following options:
Let It Weather Naturally
- Lowest maintenance option
- Inconsistent coloration over time (depending on sunlight exposure)
- Does NOT provide protection from minor abrasions
Bleach
- Accelerates shabby chic weathered look
- More consistent coloring than wood that ages naturally
- May require a coat of clear sealer to maintain desired look
Clear Wax
- Ideal for smooth faced cedar
- Brings out natural lustre of cedar
- Doesn’t hold as well on textured wood
Clear Plastics
- Available in flat (matte), satin (semi-gloss) and gloss finishes
- Specify a non-yellowing formula, unless an amber tint is preferred
- Highly reflective, high-gloss polyurethanes provide most durable finish
Danish Oil
- Tends to darken wood more than sealants
- Great for traditional palettes
- Easily applied with a brush to textured cedar or smooth cedar
Clear Lacquer
- Great option for smooth surfaces
- Not recommended for kitchens and bathrooms
- Best to apply with an air-less sprayer rather than brush.
- For best results, apply two or more coats and sand with the grain in between applications
- The first coat can be a high-gloss lacquer
- For optimal surface durability, follow base coat with one to two coats of matte or satin lacquer
- On smooth cedar, a final coat of wax will impart a rich sheen to the wood
Clear Varnish
- Only recommended for smooth surfaces
- Inevitably adds richer, darker tone to cedar.
- Two coats applied by brush are acceptable for most areas
- Additional coats should be added for kitchen and bathroom use
- Surface may show scratches but these can be touched up with a tinted wax
- Can be scrubbed cleaned with soapy water, or wiped with thinners
Varnish Stains
- Adds color pigment
- More challenging to apply than wax stains
- Available in an extensive range of beautiful tones and tints
Once you’ve selected your choice in finish, it’s time to apply your product. Be sure to follow best practices to ensure you achieve the look you’re going for. Also, proper application means longer life service and less care & maintenance down the road.
Finishing Cedar Indoors
Finishing Western Red Cedar doesn’t have to be difficult. Below are some simple rule-of-thumb do’s and don’ts to follow:
DO:
- Let cedar achieve equilibrium moisture content with its surroundings to eliminate warping caused by shrinking or swelling.
- Let kiln dried clear cedar acclimate for 3-5 days, dry knotty cedar for 7-10 days and green (unseasoned) cedar at least 30 days.
- Sand lightly with fine-grit sandpaper to remove any minor surface characteristics before applying finish.
- Use finishes specially formulated for “interior” applications in low-moisture areas of the home.
- Finish if you want to provide some protection to the cedar from minor abrasions.
- Use bleach, oils, semi-transparent and solid body stains and opaque finishes, if you want to change the wood’s appearance.
DON’T:
- Apply proposed finish without testing on a small sample of identical wood first.
- Install cedar without letting it first acclimatize to the humidity conditions of your indoor space.
- Mix brand name products. Incompatible formulations lead to inconsistent color variations.
- Apply interior finishes to kitchens and bathrooms. Instead use exterior grade of finish in these high moisture areas of the home.
- Apply finish if you want the cedar to weather naturally and only have time to lightly dust the wood.
- Apply finish without preconditioning the wood to intended installation area.
Got a question? Contact a cedar specialist today. We’d love to hear about your project!


