|

why cedar
Back
why use western red cedar?
characteristics & properties of western red cedar
benefits of real cedar
real cedar history
real cedar certification
sustainability & the environment
biophilia
forestry facts
why use yellow cedar?
products
Back
siding
Back
introduction
Back
siding home
siding gallery
virtual siding samples
siding installation videos
design & spec
Back
siding grades
engineered cedar
siding calculator
prep & install
Back
preparation
pre-building
tyvek drainwrap
general installation
finish & maintain
Back
choosing a finish
how to finish
care & maintenance
restoration
siding profiles & trim
Back
bevel
trim boards
board & batten
shingle panels
tongue & groove
lap or channel
soffits and entryways
decking
Back
introduction
Back
decking home
decking gallery
virtual decking samples
design & spec
Back
decking grades
decking span charts
span tables
decking calculator
prep & install
Back
fasteners
stairs & railings
finish & maintain
Back
choosing a finish
how to finish
care & maintenance
restoration
deck projects
Back
roof deck
ground level deck
raised deck
uphill sloping lot deck
outdoor
Back
introduction
Back
outdoor home
outdoor gallery
design & spec
Back
diy plans
pre-built kits
design tips
span tables
prep & install
Back
preparation
fasteners
finish & maintain
Back
choosing a finish
how to finish
care & maintenance
restoration
fencing
Back
fencing home
fence construction
fence specifications
pre-built fence panels
indoor
Back
introduction
Back
indoor home
indoor gallery
design & spec
Back
design tips
prep & install
Back
preparation
finish & maintain
Back
how to finish
care & maintenance
indoor projects
Back
saunas
doors & windows
tongue & groove paneling
blinds & shutters
timbers
Back
introduction
Back
timbers home
timbers gallery
virtual timber samples
design & spec
Back
grades & specs
engineered cedar
span tables
prep & install
Back
preparation
installation
finish & maintain
Back
how to finish
care & maintenance
restoration
diy projects
membership
Back
our members
Back
executive members
retailers
partners
tertiary manufacturers
certified cedar distributors
certified cedar distributors – usa
certified cedar distributor – canada
architects
international associates
why become a member?
membership levels
membership benefits
membership faq
join the wrcla!
member support
resources
Back
quick access
Back
real cedar resources
blog
gallery
videos
cedar books
catalogs & how-to guides
Back
north american publications
cedar books
international publications
environmental product declarations
resources & links
Back
western red cedar useful links
frequently asked questions
real cedar glossary
cedar book 18
|
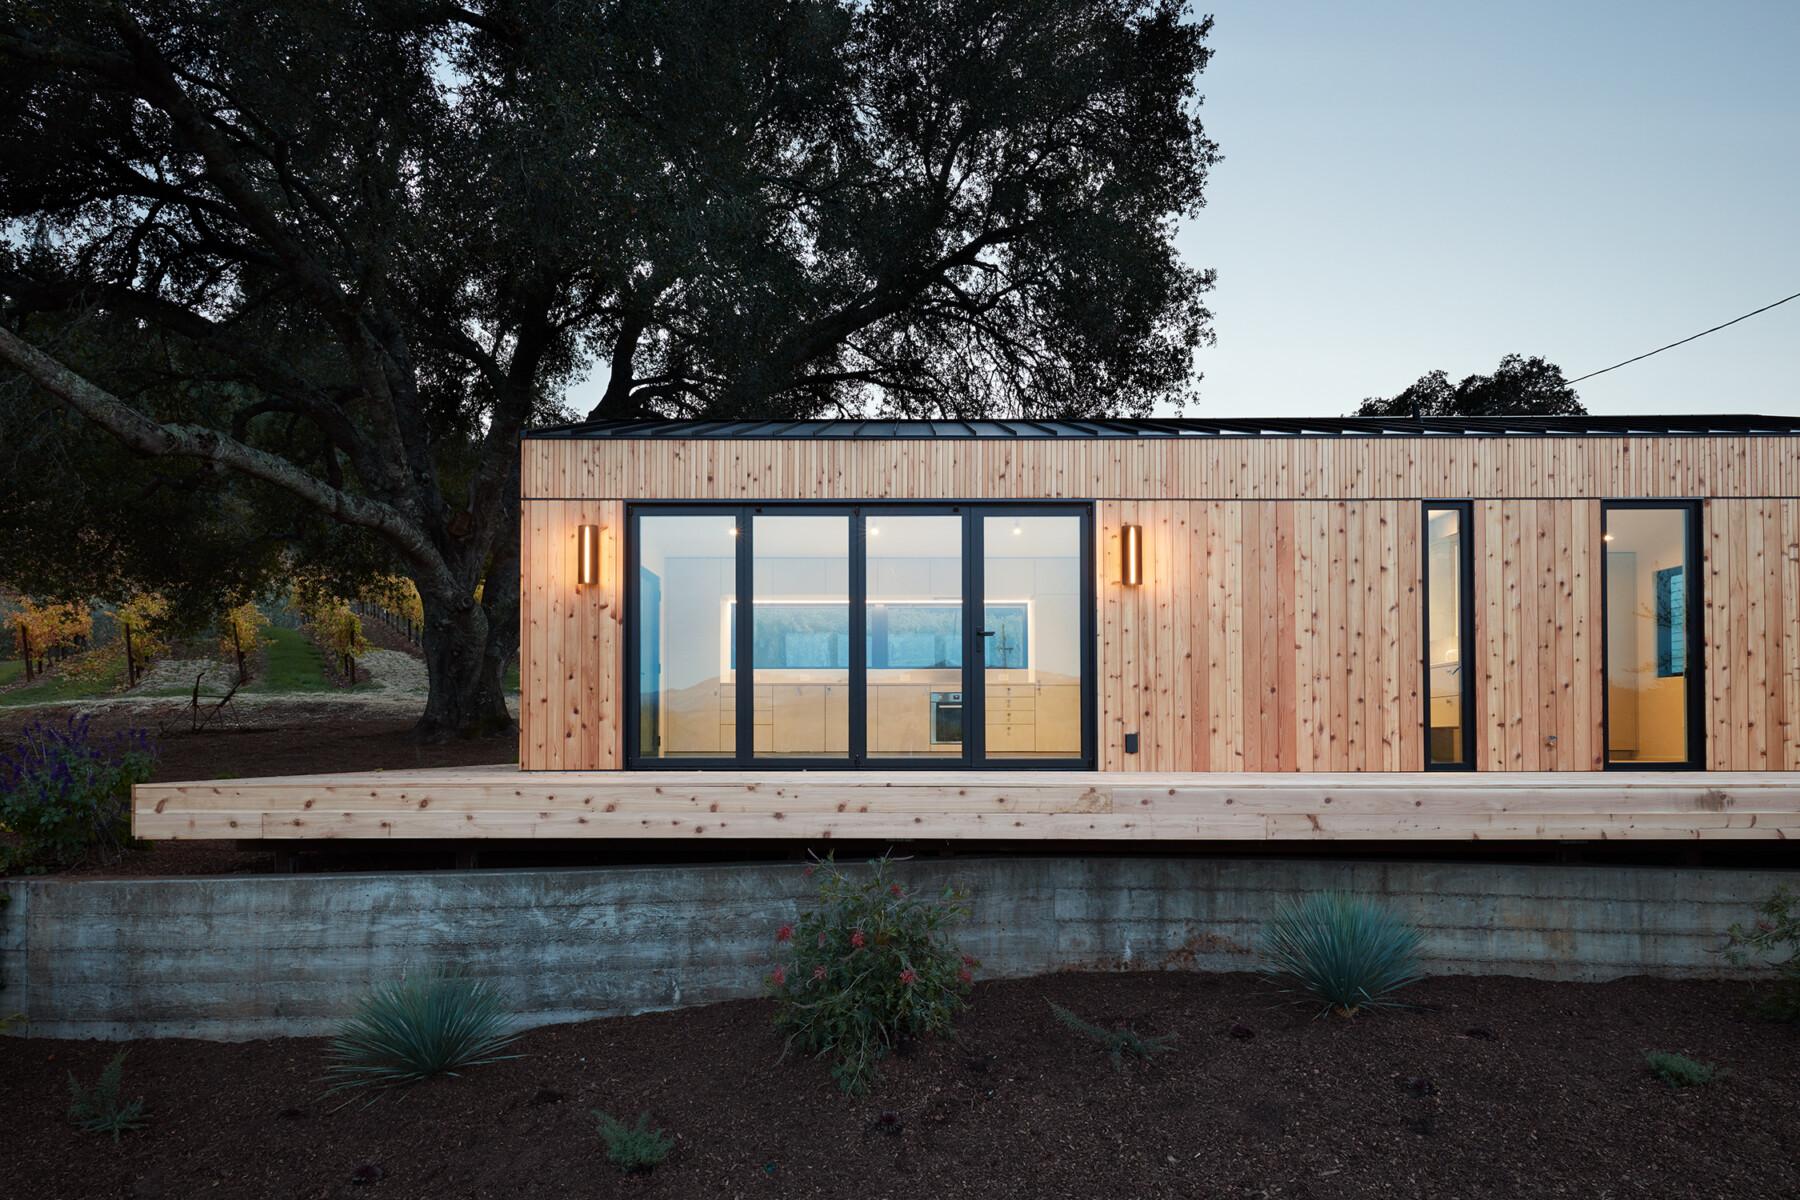
Installing Shingle Panels
Preparation
 Clean surfaces thoroughly prior to installation.
- Prepare surfaces using the methods recommended by the manufacturer for achieving the best result for the substrate under the project conditions.
- Determine prior to framing layout which corner treatment is to be utilized. Panels require a nailable area 5-1/4 inches (133 mm) of outside corners and 3-1/2 inches (89 mm) of inside corners.
- After framing is completed, install building paper horizontally, shingle style, beginning at bottom of wall with 3 inches (76 mm) overlaps.
- Corner boards, trim and molding:
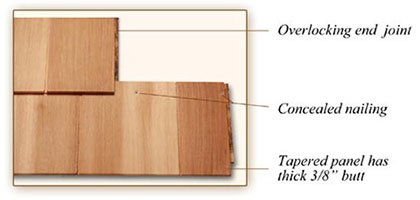
- Shall be extended a minimum 1 inch (25.4 mm) from sheathing to allow for 7/8 inch (22 mm) depth of applied shingle panels.
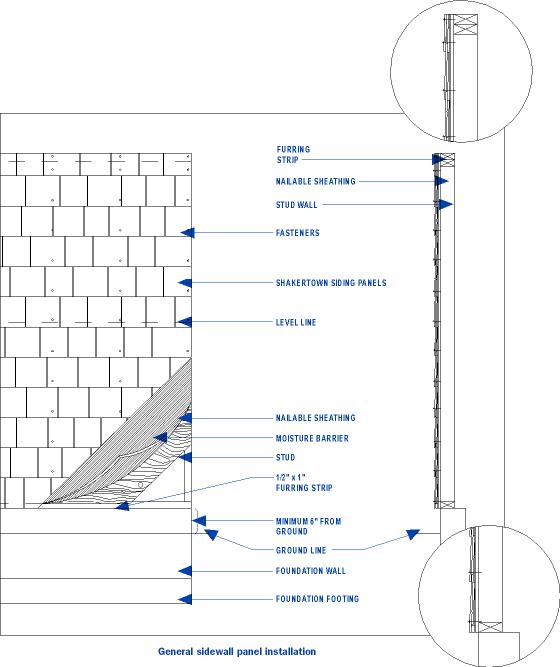
Installation
 Install in accordance with manufacturer’s instructions.
- Install shingle panels by attaching to solid nailable sheathing, spaced nailable sheathing or to studs.
- Install working from the lowest level up to the top of the wall area
- Furr out the bottom course of siding with 3/8 inch by 1 inch (9.5 by 25.4 mm) wood strips. Allow for canting of the first course of siding and install to level line.
- Drive nails flush with siding surface, penetrating studs at least 1/2 inch (12.7 mm).
- Maintain 1/8 inch (3 mm) spacing at corner boards and trim. Caulk with non-hardening sealant.
- Maintain 1/16 inch (1.6 mm) spacing between ends of panels in order to allow for natural expansion.
- Maintain 1/4 inch (6 mm) space from panel butt line and flashing.
Available from our Premium Retailers
You
Cedar as much as we do?


© 2026 All rights reserved
Gatsby Website Development by Jambaree