Installing Trim Boards
Installing Corners and Field Joints
There are two main methods used for outside corners. The choice depends primarily on the desired appearance but also the experience and skill of the installer.
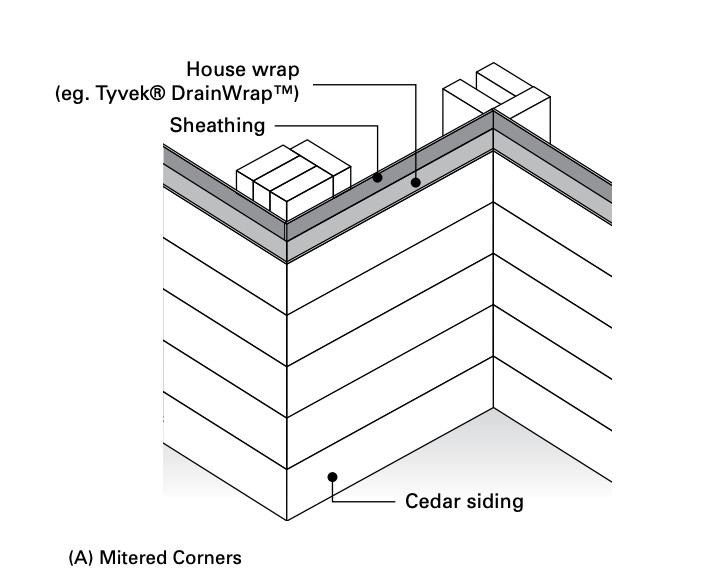 Mitered corners offer a professional looking finish. They are most commonly used with horizontally applied siding applications such as bevel. Mitered corners require good carpentry skills. They must fit tightly for the full depth of the miter.
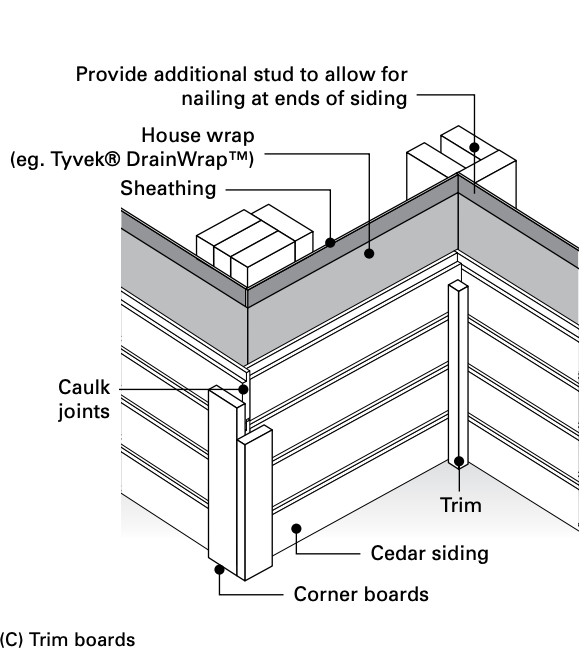
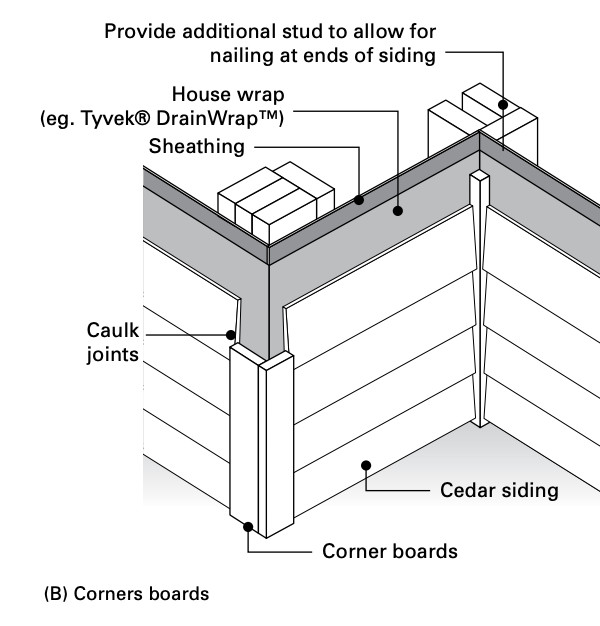 Corner boards are a popular and easier alternative to mitered corners. Thickness of the corner board will depend on the thickness of the siding. The most common are 3/4 inch or 1-1/4 inches thick. Width is a matter of taste and proper proportion. Corner boards are applied to the sheathing with siding fitting tightly against the narrow edge of the boards, allowing for expansion and an adequate caulking bead. The corner boards and the ends of the siding are nailed to the corner studs which anchors the wood for a maintenance-free joint. Designing roofs with an eaves overhang to protect corners from weathering also helps ensure trouble-free joints. Always apply primer or stain end cuts. With corner boards, there is the choice of applying them next to the siding or over top of the siding as shown here.
 As in the above illustration, at inside corners, siding is frequently butted against a 2 x 2 trim strip. It can also be butted against adjoining walls with a trim strip used to cover the joint.
Field Joints
When butt jointing siding, cut ends at 45 degree angles to form an overlapping joint. This is particularly important for vertical installation. Ensure joints meet on studs, blocking or furring strips with the nail penetrating solid wood at least 1¼ inches.
All installers should learn and follow “best practices” in order to deliver a better job for their customer and reduce call backs.
Available from our Premium Retailers